It started out like this; sometimes to stay motivated about a bigger project, you’ve gotta have a distraction. Something smaller, quicker and easier to knock out.
Back in the late 70’s, I’d built several Star Wars model kits, all from MPC; R2-D2 & C-3PO, Darth Vader’s Tie Fighter and the one that every kid wanted to pilot into the Death Star Trenches, Luke Skywalker’s X-Wing.
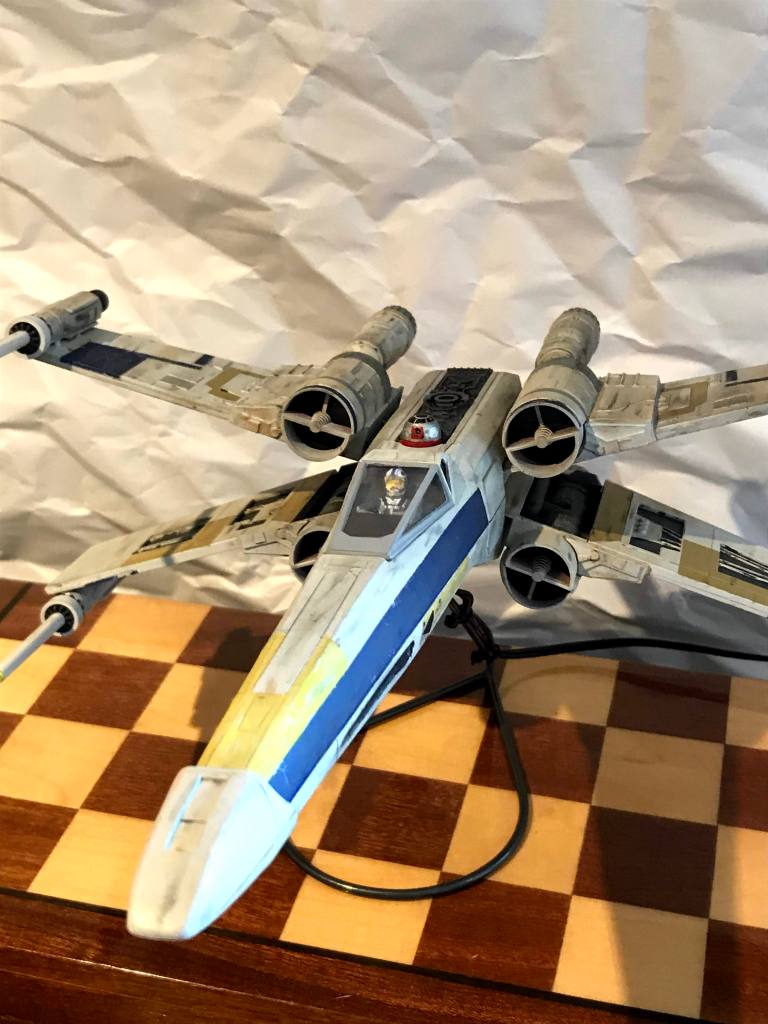
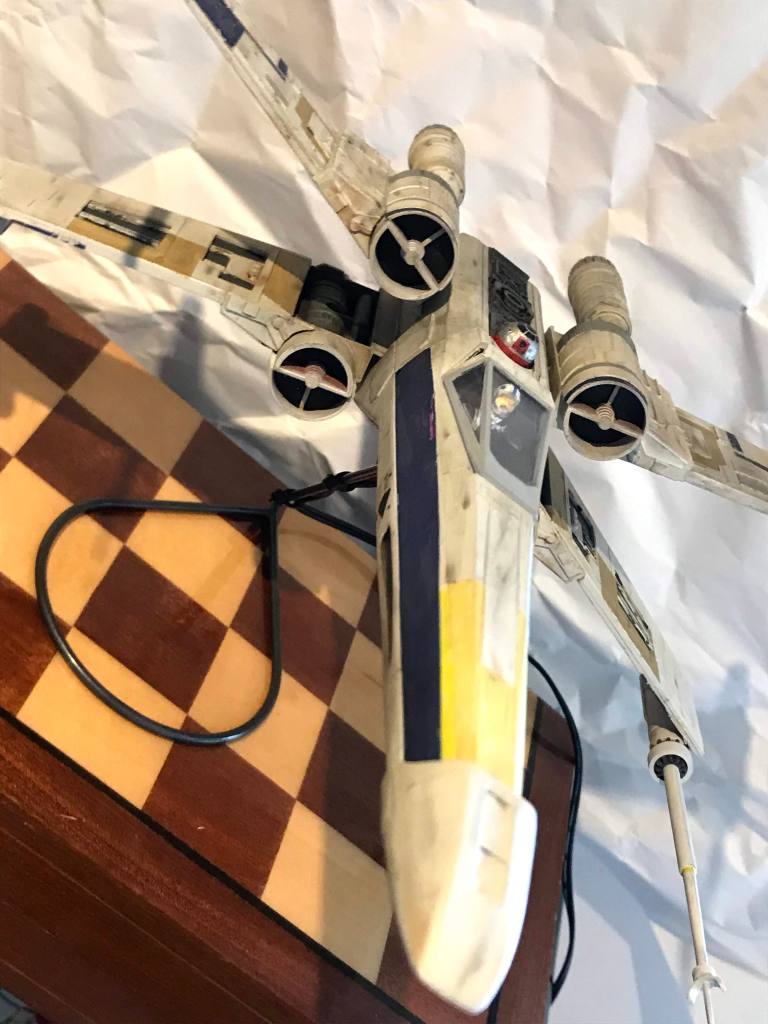
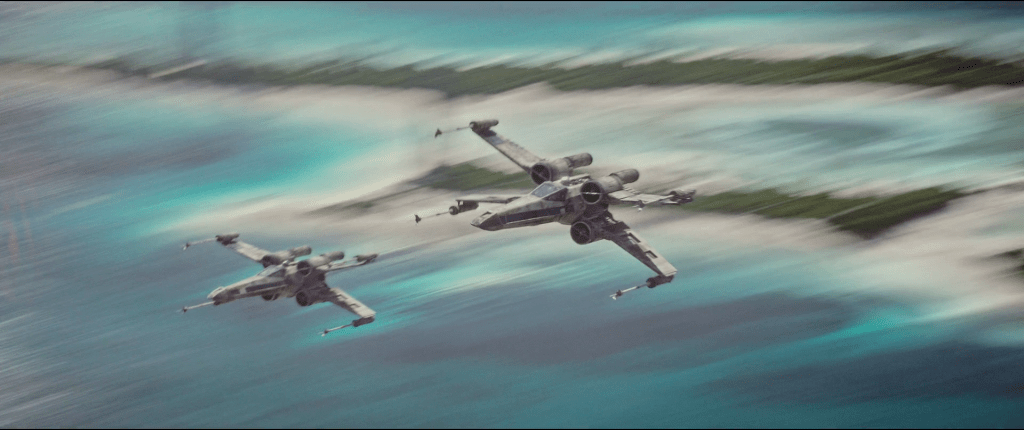
My X-Wing started out life at a standard build, with very little paint or detail. But then my buddy showed me his, complete with battle damage and weathering, so the game was on! Plenty of sooty streaks and scratches; an engine that’d exploded out the side, showing its innards made from old telco wiring. And the decals were painted over – from the original Red to a cool, flat Royal Blue. Add a couple of flaming birds from a 1/24 Trans-Am kit just behind the rear windows, and my take on Blue 5 was born, 30+ years before it was seen on the big screen in Rogue One.
Sadly, my X-Wing along with many of those models from my childhood didn’t survive the intervening years.
So an X-Wing it was to be. And with Rise of the Skywalker due to be released in 6 months, I figured I had plenty of time to knock one out, then return to the Falcon. Oh, I was naive!
I jumped on eBay and found a 40 year old X-Wing kit that had been opened, but was complete and unassembled (except for the R2 Droid).

However, I’d forgotten just how crappy the molding on this kit was. And it’s possible that 43 summers had taken their toll on the polystyrene, too.
After inspecting the contents, the good news was that every part was there! However the top and bottom hull pieces didn’t match very well, and the clear rear window was badly warped. Industrious work with sandpaper and files managed to shape the hull pieces into a sort of match. Any other flaws would be solved much more easily.
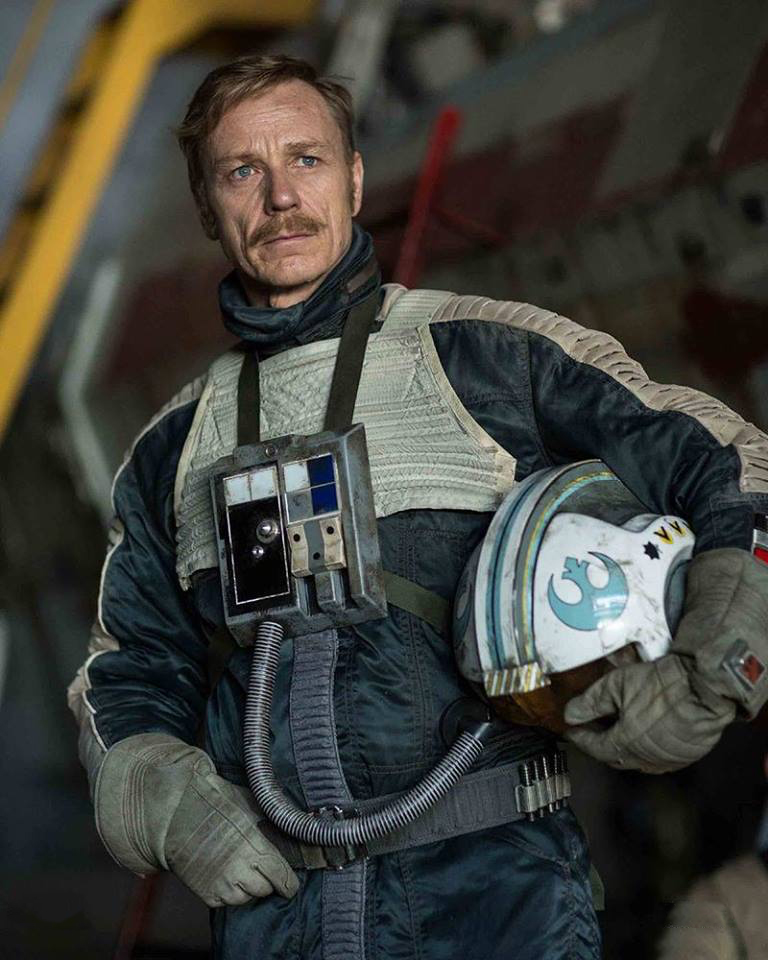
Around this time, I decided to turn this into Blue Leader’s X-Wing from Rogue One. There are several reasons for this:
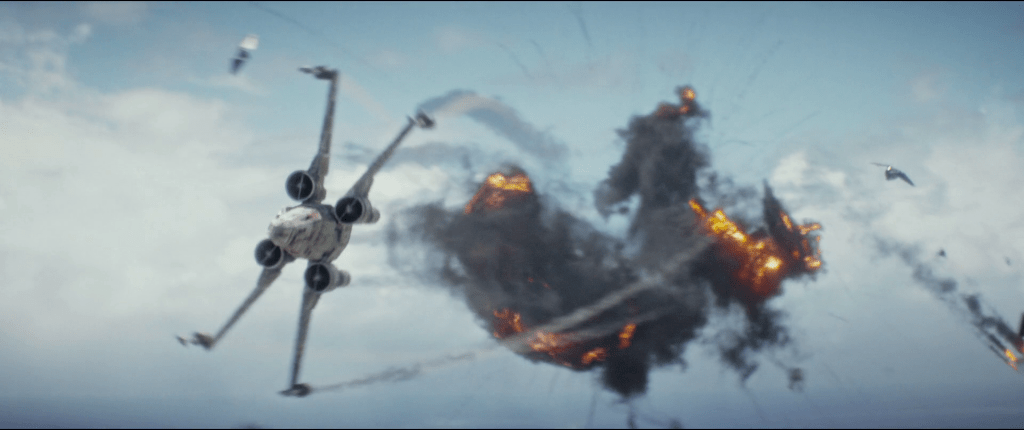
- Blue Leader, A.K.A. General Antoc Merrick, was the most seriously kick-ass pilot in the Rebellion until he bought the farm in the Battle of Scarif.
- The Blue Squadron X-Wings have literally been through the wars, and have the scars to prove it!
- Blue is my favorite colour.
- I’d previously painstakingly painted blue over the red decals on my original X-Wing (winding up a sort of deep royal blue), and it looked awesome.
- I didn’t trust the 40+ year old decals in the box, so I figured that I’d have to print my own anyway, so why not re-colour them blue?
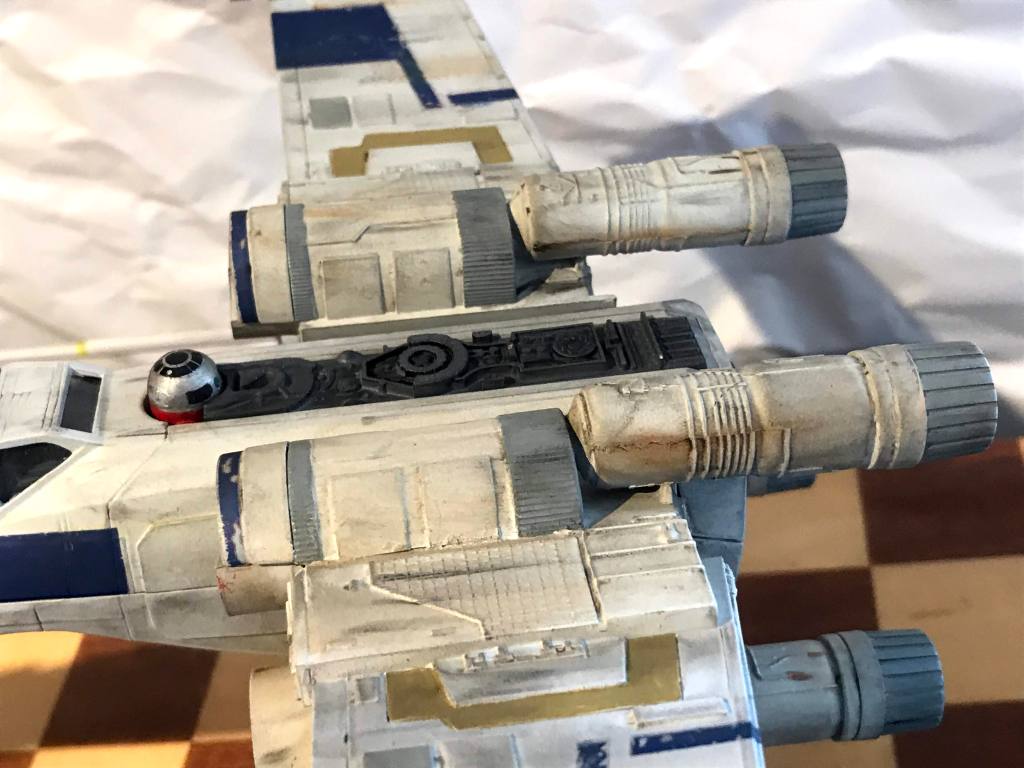
I scanned the original decals, and recoloured them to match Vallejo 71.111 USAF Light Blue, which I also used for the pilot’s flight suit.
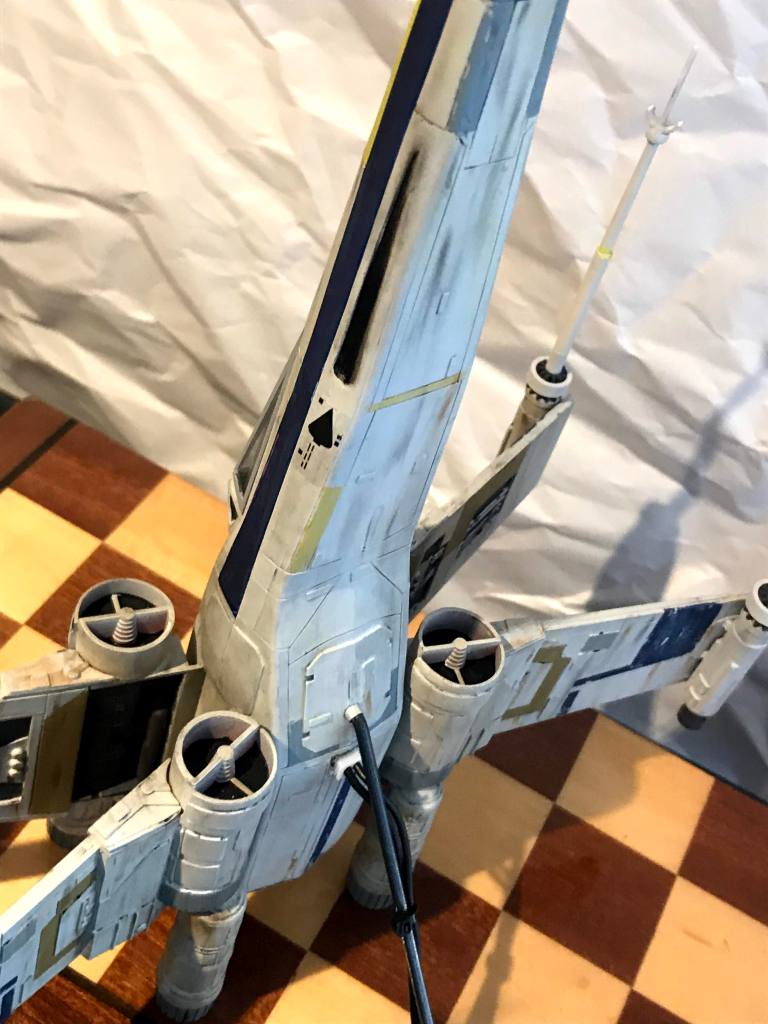
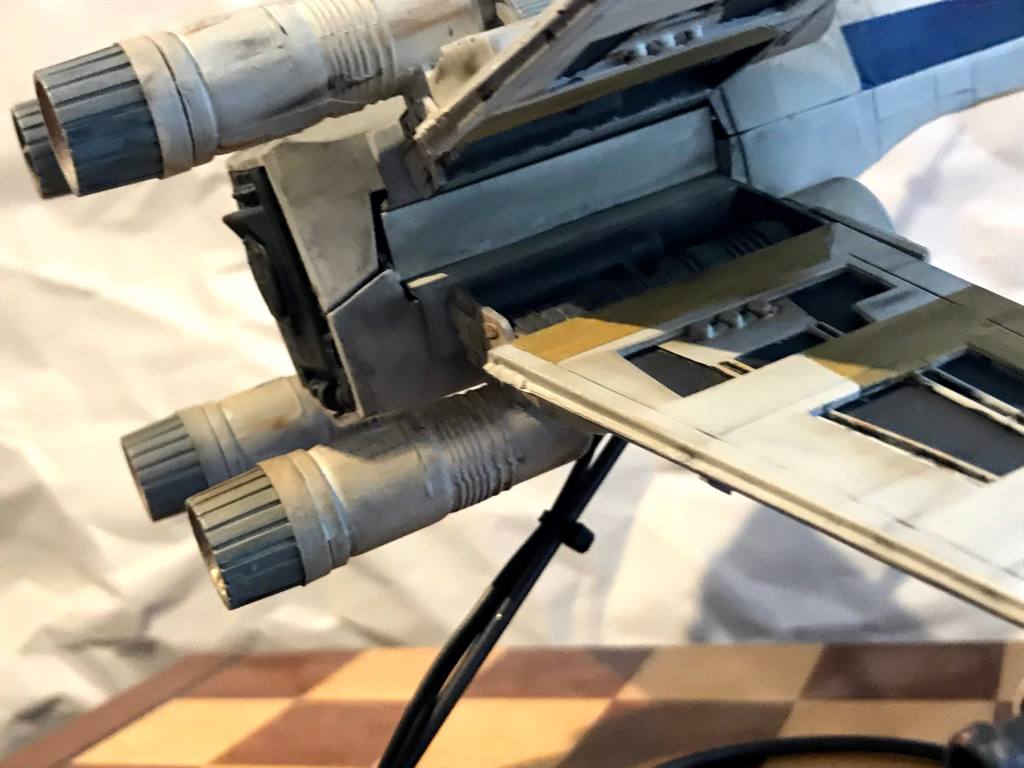
After sanding, filing and test fitting, all polystyrene parts were primed with Tamiya Oxide Red Fine Surface Primer (rattlecan). Everything except the top deck insert and the rear panel were given a couple of coats of Tamiya AS-20 Insignia White (rattlecan). The back halves of the engines were sprayed with Tamiya AS-2 Light Gray, with the exhaust nozzles done with TS-81 Royal Light Gray.
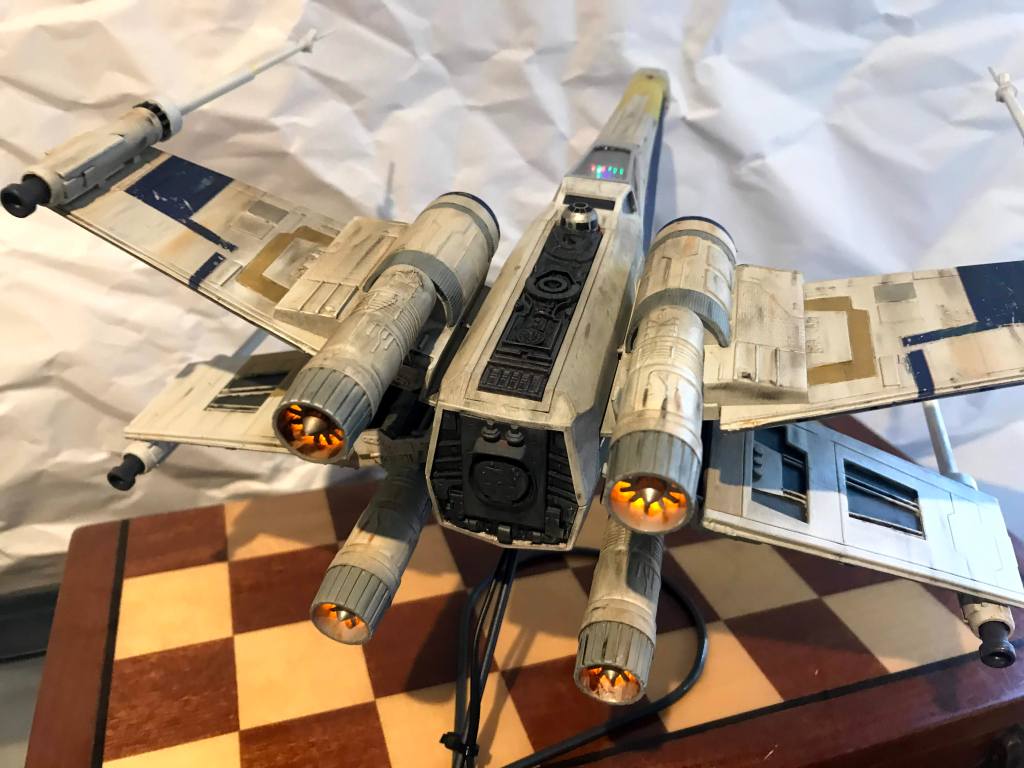
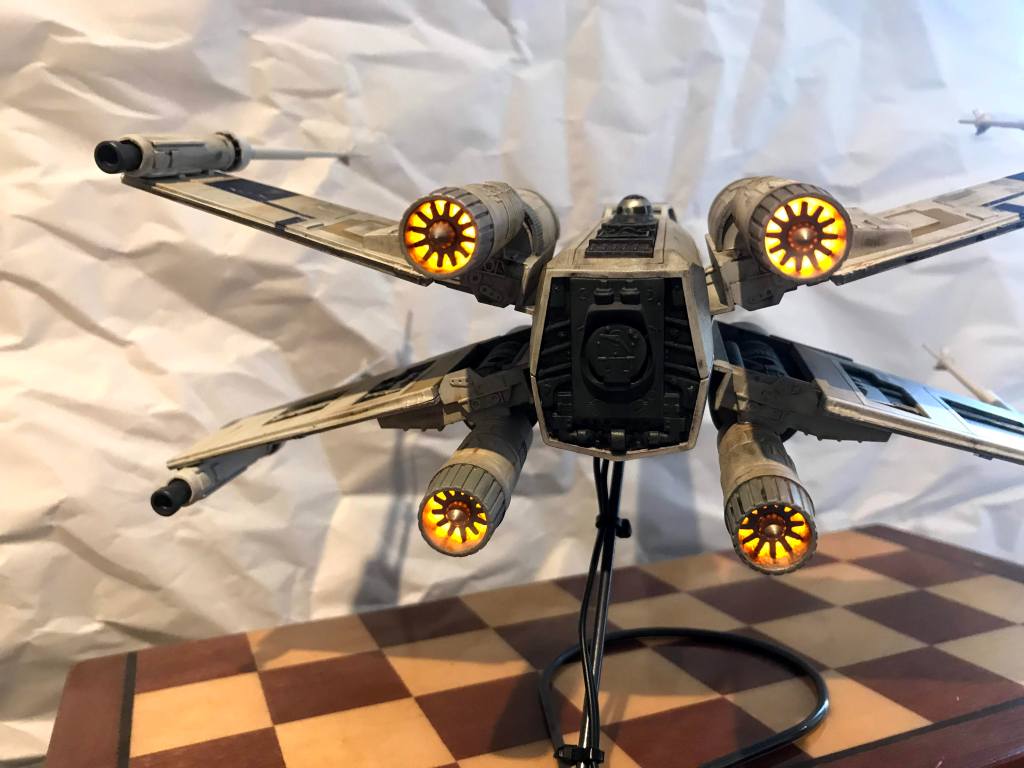
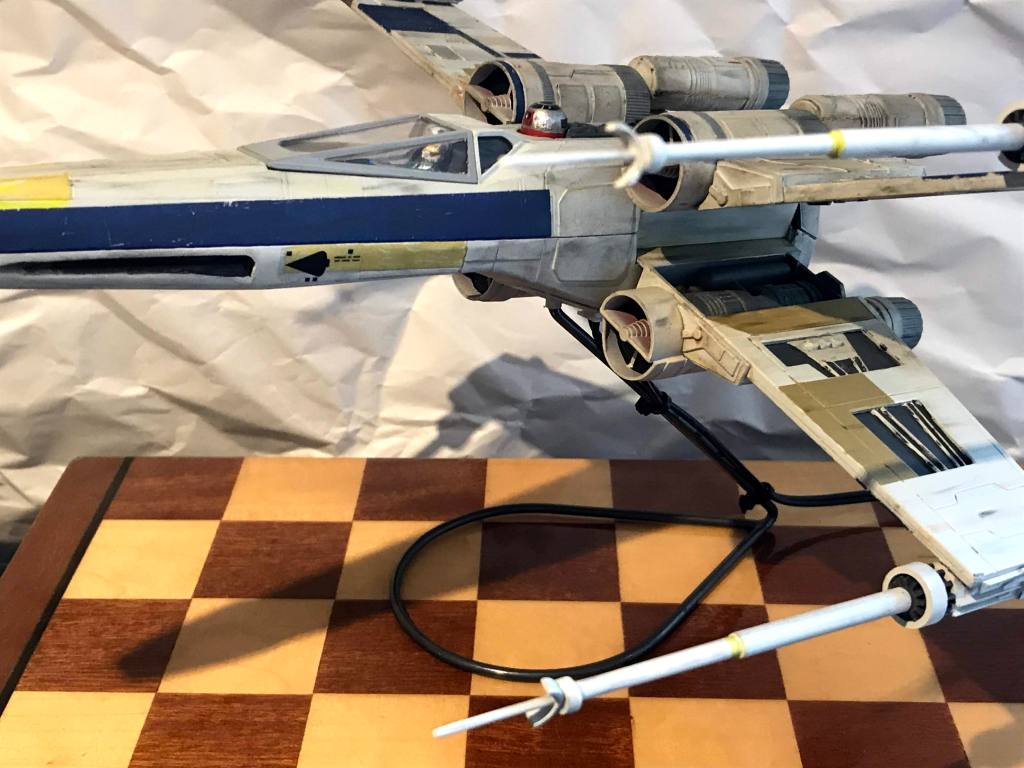
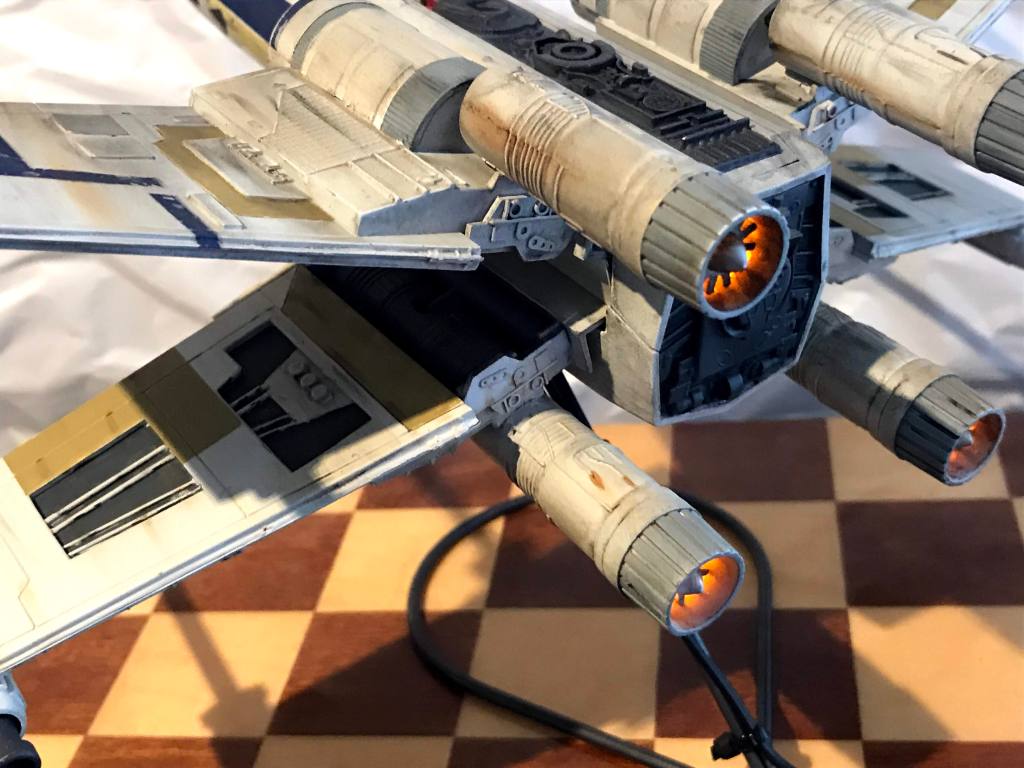
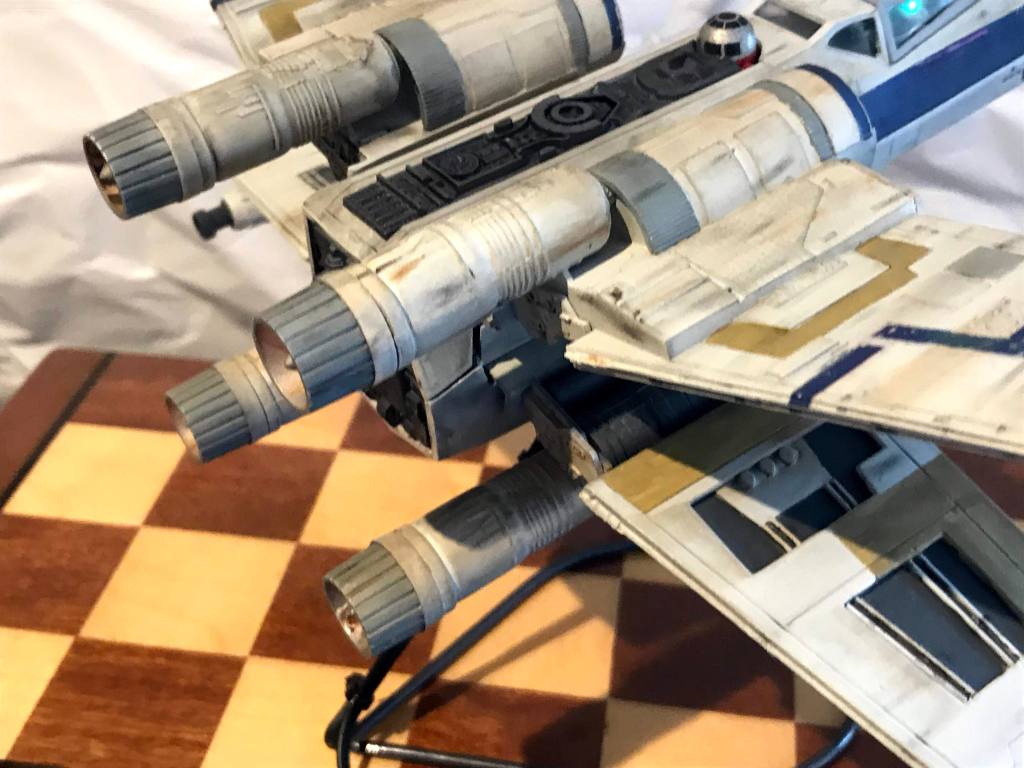
The wings received some scratchbuilt detail to the inner surfaces, while the engines and nozzles were drilled and fitted with amber coloured “flickering” LEDs under the “turbine” piece in each nozzle. I painted the inside of each nozzle with Vallejo Chrome 71.064 to enhance the lighting effect.

I printed out the new decals on an inkjet printer using genuine OEM ink; I tried with the cheap substitute ink, but even after days of drying it ran. With good ink, two days drying and Microscale liquid decal film, I got some good transfers.
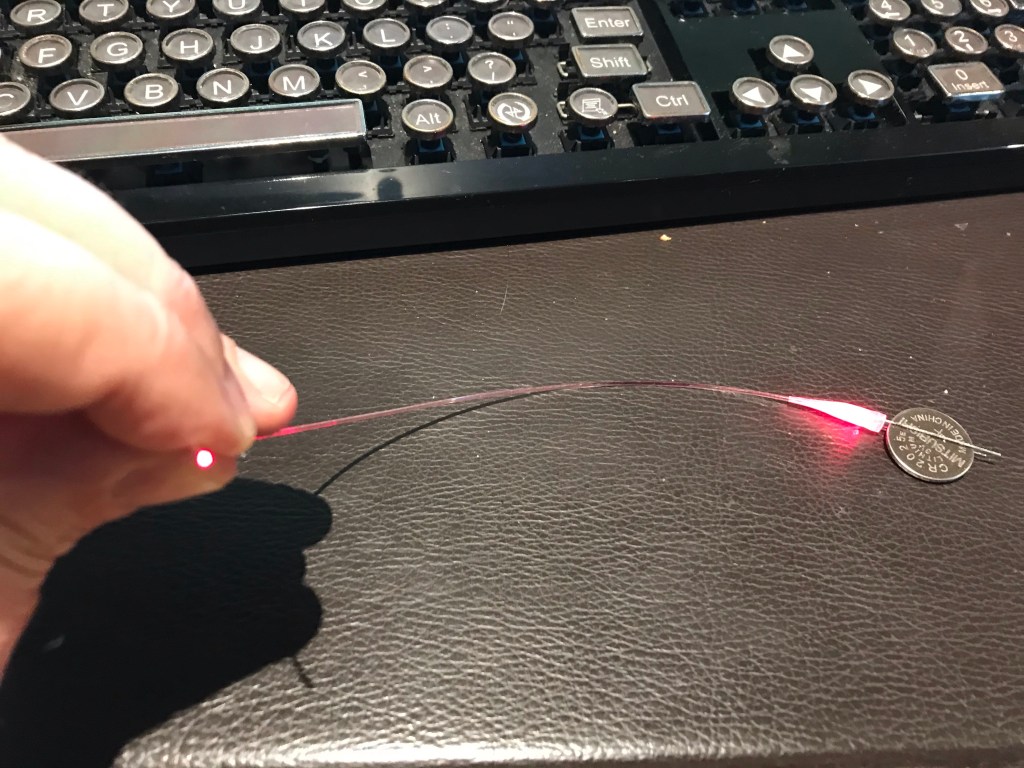
Additional lighting for the cockpit was added using a few 0.5mm fibre optic strands with green, red/blue flashing and multicolour 3mm LEDs. One trick I discovered when using 3mm LEDs was to use Flexi-Tips to act as a grommet for the LED and guide for the fibre optic strands! Just primer over the outside and use some black silicone as a light seal and glue.
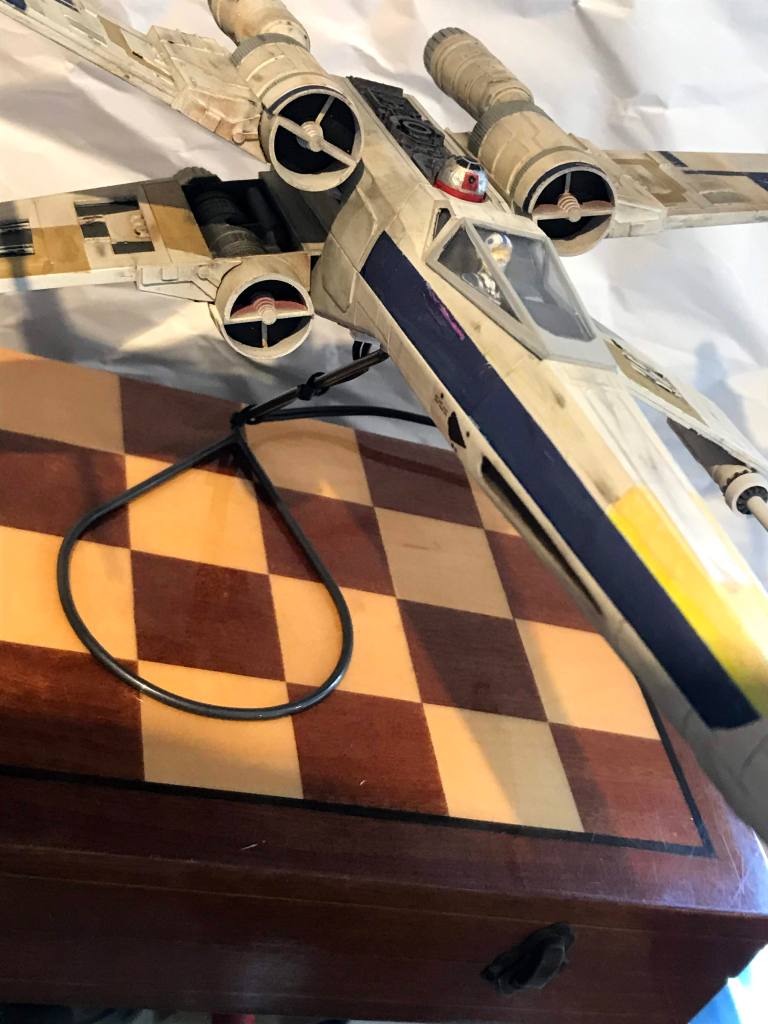
Also useful was a substance called Kintsuglue from Loctite. This is a putty that is nice and workable from the packet, but sets hard as gorilla snot! The black variety also is a brilliant light blocker, and is super for filling in those annoying gaps found all over this kit: behind the cockpit; inside the fuselage near the wings, etc… It’s structural strength and hardness made it ideal for securing the tube for the new stand, and the power connector socket.
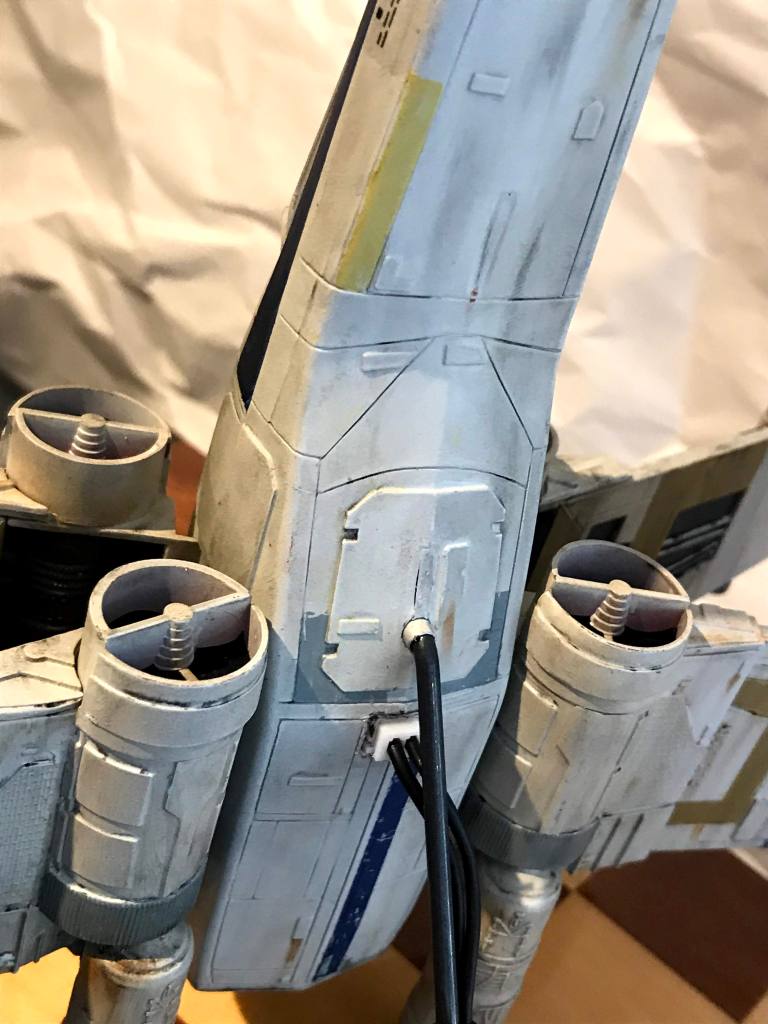
The engine lights wiring was hidden in the interior and exterior engine parts, and run into the fuselage near the centre of the wing pivot.
One of the last problems was remaking the rear windows. I didn’t want to use the Testors Clear Cement and Window Maker product; it is great for creating a thin clear film over an opening, but it’s really fragile and distorted. I wound up digging through my old office supplies until I found a package of printable Overhead Projector transparencies! They’re basically very thin clear sheets, and after some experimentation, I found that they work well with regular CA adhesive!

After the decals went on, the whole kit (except the cockpit canopy) received a clear coat of Mr. Hobby Mr. Super Clear UV Cut flat. Now on their website, Mr. Hobby states that this is only intended for use with their acrylic paints. So I did some tests on some scrap painted with Vallejo Air and with my printed decals, and it had no issues. Also, as it’s not waterbased, it made a great undercoat for the weathering.
I weathered the model with black and rusty brown oil paints, making it’s appearance sooty and a bit leaky/rusty in places – well used!
Lastly, I didn’t trust the original clear plastic stand to be up to handling the weight of the model after 40 years, so I recycled one from a commercial plane model – a simple heavy duty wire base that could be bent a bit to add character.
So here it is: my Blue Leader X-Wing – only six months late! Enjoy! Now back to the Falcon!